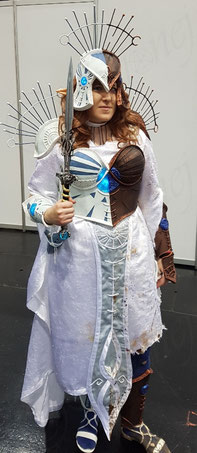
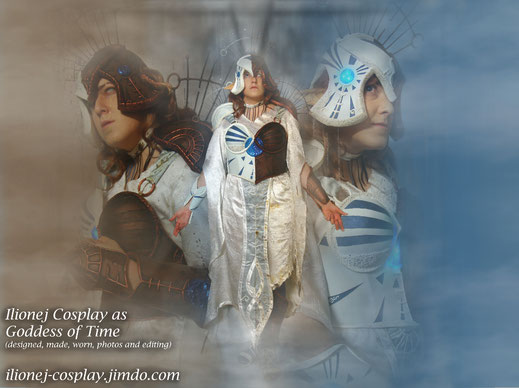
Goddess of Time (Legend of Zelda)


It is the impelling force, the regnant, the omniscient. And that is no different in the video game series The Legend of Zelda. Always present, not only in the course of the day, but actively in the life and deeds of the young hero and protagonist Link. By her grace and gifts she allows him to travel through time or even stop time’s flow, speed it up or slow it down(depending on which of the games you play, of course. ;) ). She is friend as well as the biggest enemy – most especially in Majora's Mask. In no other game of the series time is as relevant as it is in Majora's Mask, where only 72 hours remain for preventing the destruction of the land Termina – and without the aid of the Goddess and her Ocarina, which she passes to Link through Princess Zelda’s hands(the Royal Family of Hyrule has been guarding this sacred instrument for generations), the land and much more would have been left to doom..
Yet much earlier in the history of Hyrule, long before it was founded as a kingdom(in the time Skyward Sword is set and in the following decades), time was omnipresent, inter alia as a tool. There were large deposits of a mineral that could transport whole landscapes into another era by simply working force on it. The exact mystery behind though is lost in time. However, there is a theory that the Ocarina of Time has partly been crafted from this mineral.
In Twilight Princess time majorly acts as a showcase of decay. But even there exists a portal into the past, which can be opened by use of the Mastersword – only weildable by Link. The very sword that had allowed him – or one of his ancestors with the same name – to travel through time before.
These are only excerpts, because also in other games like Wind Waker and Phantom Hourglass manipulating time or travels into a preserved past play a part.
Fact is yet, as with all in the series, there is a divine force behind time as well, a force that keeps everything in order. And – despite being so present, time is untouchable and so nobody ever gets to see the Goddess herself..

Costume Info
..like said, she is never shown. Almost a joy for a cosplayer like me, who doesn’t really manage to finish “actual” cosplays, but usually gets lost in her original creations.(as of November 2016)
This way I could gladly enjoy my freedom and design the Goddess in the way I wanted. Still I have used many elements from the games that regard time, may they be actual occurences or simply decoration. They are from:
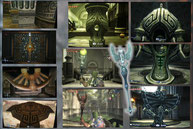
Twilight Princess(mainly the Temple of Time) -
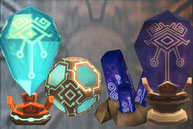
Wheels that remind of clocks(which is also a reference to the constantly ticking clock/s in Majora's Mask), stylistic depictions of the Dominion Rod – an item that allows control over guard statues, but its power(and colour) has faded over the centuries – which for example is shown on the left side of the costume that represents the evanescence of matters(of course not without referring to some battles that even a Goddess can’t go through without damage). This is also visible in Lanayru Desert in Skyward Sword, the place were once Timeshift Stones were mined, before the sea made way for the sand.
Lanayru Desert in Skyward Sword, the place were once Timeshift Stones were mined, before the sea made way for the sand.
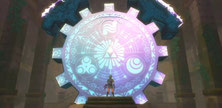
Further it is the decoration on the Gate of Time from Skyward Sword, which can be seen in the small ornamental details as well as in the starbusts. In addition (as centre of – see below) Timeshift Stones, the above mentioned mineral(those are glowing like in the game on the “present” side).
Part of this ornamentation are angular spirals that can be found in many designs in Wind Waker (there majorly representing the wind and the ocean’s waves) and its direct successor Phantom Hourglass. From the latter also comes the hourglass, which can be used to manipulate time

The immersions (on which on my armour sit the crystals) remind of Time Blocks from Ocarina of Time which can be manipulated with the Ocarina of Time by playing the Song of Time to help reaching far away places in various areas, as well as the gate to the sanctuary(inter alia the hall where the Mastersword is kept) of the Temple of time. By opening said door, the true dilemma in the game unfolds..
Now to the actual story behind my decision to take on that madness..
In the beginning there was – my despair about the length of my hair (82cm). I wanted to cut it for various reasons, but not waste it. But as it was(is) useless for wigs due to its condition and additionally the only association in my vicinity that would take hair donations had reached maximum stock, I couldn’t help but playing with the thought of using it in a costume. It should be part of a helmet.
Like a kind of Elven Warrior I wanted to illustrate my zodiac; Gemini; with two sides as a sign of my constant inner conflicts with myself, as well as showing off my many sides. But somehow I couldn’t agree with myself on the colouring/actual design. ;)
Eventually the combining idea came to me: as a huge fan of the Legend of Zelda series and all the imagery of time in it – as well as the fact that I was about to cut off 10 years of painstaking hair care, the case was clearer than the water in the pond of Termina’s Mountain Village – and thereby the discussion around the colouring off the table quite quickly.
Far too many scrolls(apparently I wasn’t fed with them after Thranduil yet) made way for “easier” decoration with meaning. The hourglass(originally as a sign of constant hither and tither in shape of almost a Möbius strip) remained of course, as there exists more than one connotation.
What had to go – was the hair.
Yes, you read right, the hair. Not only that I cut it off, but the concept had turned out to be; if though not in feasibility; not flawless. On one hand it would have covered the decoration on the helmet, on which it might have gotten caught all the time as well, and on the other even as ponytails the weight would have pulled the helmet back so bad I couldn’t have gone without additional constructions for keeping it in place. Because the possible counterweight at the front wasn’t suitable anymore. A Dragon’s and Unicorn’s horn each a side wouldn’t have made much sense on a Goddess of Time.
Therefore I will find other(link – lol – follows once the section is online) use for it.
Costume Status
~ DONE ~
Time exposure: (lol)
- Dress: 14h40
- Choker: 8h40
- Apron: 12h55
- Stockings: 2h
- Shoes: 0h50
- Helmet: 80h20
- Pauldrons: 63h15
- Bracers: 38h20
- Knuckles: 18h45
- Chest Armour: 89h05
- Shins: 55h50
- Ocarina of Time: 4h50
-
Ocarina fixing string: 0h30
- Ears: 3h25
- Scars: 0h05
Total: 393h30
Costs:
- Fabrics, cords, ribbons: 46,40€
- Shoes: 17,90€
- Wig: 9,90€
- Beads: 7,50€
- Buckles: 2,21€
- FimoAirLight: 5,62€
- Electronics: 5,50€
- Ocarina: 9,90€
excess material: €11,62 (due to change of plans)
Total: 104,93€ (expandable to 116,55 ;) )
ViennaComicCon 2016, November 19th, Messe, Vienna (Austria)
AkiCon 2017, October 21st, Seifenfabrik, Graz (Austria)
AkiCon 2019, October 12th, Seifenfabrik, Graz (Austria)
Jury Favourite, AkiCon 2019
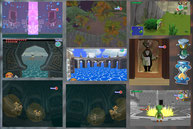
Photogallery: Goddess of Time - Progress
Chest Armour

Let the battle begin! After I transferred the paper patterns onto regular cardboard, I connected the cut and bent parts with flush-mounted(only on the front) curtain tape and hot glue. Base for the breast parts was an acrylic deco ball. Painter’s tape applied and cut into(not really geometrical) meridians gives you – a rough pattern that somehow works perfectly in the end. Normally you wouldn’t use full hemispheres, but since I wanted a reagular hourglass, it was necessary to keep the parts as they were. Fine 0,5mm grey carboard on the outside and inside makes a smooth and sturdy surface.

Now to the detail work. I first sculpted the edges with FimoAirLight, which I sanded by hand. Though that required caution when cutting out the details, but this way I didn’t have the clay on all edges. This also made later adjustments easier. You might believe that I could have cut all the details beforehand, but that is an illusion. (Everyone who made something like this can agree that large sheets work against all tolerances when getting glued on.) Besides, it was easier to fit the details into the finished armour this way. Here you can also see the first details made from de-wired(did I invent a new word?) clothes line as well as the elements that hold front and back plate together. However I had to wait with gluing the velcro to the the backside until I had painted the front and glued in the cords.

Some beads as sand for the hourglass and ornaments
pressed into the Fimo with files and punches(easy due to the crystalline structure), some battle marks onto the left side and we’re already priming. I now am used to prime with acrylics beneath
the waterproof wood glue as well. It is especially necessary when you use lighter or less opaque paint(e.g. my glow-in-the-dark light blue mix, white or most metallic acrylics). Acrylics
furthermore are easier and more covering to apply on carboard and the final layer is only(on the light side) to conceal the shine of the sealing wood glue. In addition some varnishes etch the
waterproof wood glue, while they have no effect on acrylics. The black priming is for saving copper, covering light areas and also to give the copper a slightly darker underlay.
The priming beneath the wood glue is an additional safety method for preventing visibility of possible damage of the paint by wearing the armour. Also here it is important(or recommended) to
apply the same primer onto the wood glue. But as said, be careful with spray paint!
Before I took on the final paint job, I drilled holes and inserted the LEDs. The battery cases(from electric tealights with button cell batteries), switches and cables are flushed on the
inside.
Marginal note: the darker blue is fluorescent, which means as much as it is glowing in black light. That the light blue is phosphorescent, I mentioned already. But so is the iridescent turquoise
priming of the areas where the crystals will be glued on later – thereby they remain glowing a little, even after the light is out. The LEDs and the fixing hot glue are merely toned with nail
polish that I dyed with resin-dye.

Here the paint on the side elements, gluing in the cords and the straps between chest piece and pauldrons. For the latter I have used rubber straps and snap buckles. Placeholder while sewing was a steel ring(wanted to use and paint those as I reckoned with more traction force). I simply cut the plastic curtain rings with a knife, drilled a hole into each side and glued in a brass wire peg with epoxy resin adhesive. On the white one I sealed the splice with wood glue, acrylics and acrylic varnish, and the left copper one I treated like the rest of that side of the armour. (To not mess up the parts as well as to hide them better, I used black snap buckles, rubber straps and velcro tape on nearly all of the left side, by the way. ;) )
Arms & Legs

Builidng the bracers and shins went pretty much alike, only that I had to enhance the thin connections in the bracers with brass wire pegs and the shins required straps. These; like on chest armour and pauldrons; consist of flushed rubber straps with snap buckles and a sewn hollow strap pushed over. The button holes are for hiding as well as being able to open/close the buckles.

Here you can see a little more of the straps. Also that I calculated them with stretched rubber straps which does clinch them when being loose, but once the buckles are closed, they lie evenly around the leg, as though they did all the work. The knots cover the buckles and provide more security. To prevent sliding even more, I sewed push buttons onto the insides of the upper straps – their matches are on the stockings.

In this picture you can also see the rubber straps that keep the hand covers in place. FimoAirLight and clothes line for details again. You can also see the ornaments in the Fimo much better here.

The same priming and painting as on the chest armour and 3 LEDs per stone on the right.
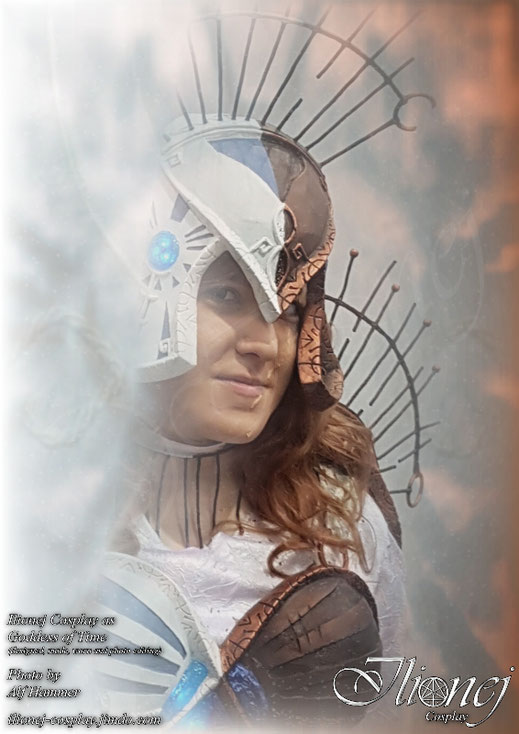
Helmet

Glue painter’s tape onto a plaster bust of yourself – and hope it fits. And it did! The base shape for the helmet turned out so perfectly I can gladly say I might happen to use it again more than once. The usual basic cardboard and “quickly” added curtain tape, hot glue keeps the magic together.

More 0,5mm fine grey cardboard on in- and outside. Surely I would have been able to make it a little more round, but I just didn’t want to do that(to myself). “Half an hourglass” glued to the top and we’re heading for the details from FimoAirLight and de-wired clothes line, as well as cut them out.

The notorious skewers: “paunched” clothes line, wooden beads, plastic curtain rings, cardboard base/brace, velcro tape and loads of hot glue. Here you can already see the details drewn onto the Fimo as well and the primed right side – for safety reasons(otherwise the escess hot glue just comes off the clothes line again and again and since it had to be white, I needed more layers of acrylics anyway).

As you can probably see, I went to great pains to continue the detail work. LEDs under the right crystals and the helmet is done. Also the Ocarina and apron get a little preview here.
Pauldrons

The concept applies on the whole armour, so also on the pauldrons. On them however, the straps aren’t stretched since they only keep the pieces in place, rather than having to fight gravity. (And it might have caused some pain while wearing. ;) ) Be careful when cutting pieces out of sculpted FimoAirLight edges! Due to the crystalline structure and the dehydration the material is under some tension. This can result in gaps once you re-insert said piece. But no worries. It’s nothing hot glue can’t fix and with some adjustments, it’s all fine.

I think, there’s not much to say on that anymore. Except perhaps that I painted on most of the light copper parts with my fingers and only made the one or other alteration with a fine brush. Oh yes – and I cut my face from the final product. As you can clearly see here, the – skewers – are still flexible, which reduces problems on events. Acrylics are a little flexible as well. So, there should be hardly any danger of chipping paint in a heated(!) surrounding. On the left side, the awkward bending is intended. On the right though, it was caused by moving through between people.
Excursion: "Stone and Sand"

A little recourse to the crystals. They are made of a ring-like basis from blister pack plastic and a lid from the same material, as well as sculpted with hot glue. That allows relatively good fitting, weight and cost savings(compared to e.g. resin cast or thermoplastics) and I could wonderfully paint them with model making paint as well as nail polish that I dyed with resin dye. No varnish was necessary, but if you like, you can of course spray them. Yet caution. Some brands of nail poilish don’t react well to solvent.

In this picture you can see how I made the lighting. Electric tealights are cheap and consist of a great circuit with battery case. Just add some cables and you got a little compact thing to build in. Of course I changed the position of the switches. To make the deactivated Timeshift Stones more accurate, I additionally lightly painted the hot glue stones on the left side with iridescent bluish purple acrylics. That does not only reduce the heavy blue to a sort of priming but also block spare light in the divided crystals, even in the dark.

Last is a recourse to the sand in the hourglasses: painted glass beads. That was some fun! Just paint waterproof wood glue on and scatter the beads. Only on the small ones I needed to adjust them with a fine brush or tweezers.
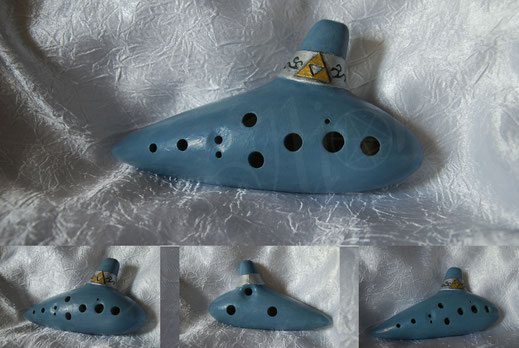
Ocarina of Time

At this point I would like to thank the company
Thomann for offering a cheap 12-hole plastic ocarina in their store that even has a comparatively wonderful sound.
(Bought a second one for Saria’s Fairy Ocarina right away as well.)
What is supposed to be a metal ring in the original, is made from 0,5mm fine cardboard. Lovely fussy job. The biggest effort were the several layers of paint to cover the little flowers and
birds. The base prime is a bit darker and painted over with a lighter tone. A thick layer of waterproof wood glue and more of the lighter acrylics. The mix, by the way, is one of the blue mixes I
used for the armour(white, silver and glow-in-the-dark blue, as well as fluorescent blue, iridescent bluish purple and a little bit of white and black) plus more glow-in-the-dark blue. Last
another thick layer of waterproof wood glue to feign a glaze and acrylic varnish on the metal part as well as additionally on the mouthpiece. Even though the wood glue is waterproof, body
fluids(like e.g. sweat and saliva) can dissolve it and it doesn’t dry clear anymore but slightly white. The applied water-dilutable varnish prevents that, although you can only paint on one thin
layer after another since it does affect the wood glue a little. This way you get something like an alloy and can play without issues.
To that another little warning: Never cover the holes more than necessary and apply the varnish with a thin brush only! Even more caution on the mouthpiece, please! Too much paint or coverage of
the gaps changes the sound and playability!
The fixation of the Ocarina on the armour(to the rubber straps on the inside) is a simple but clever construction of two cords that stays in position easily, but can be opened by shifting the
weight(namely by taking the ocarina in hand and brushing off the rear sling). Maybe somewhen I will sew a new strap with a button. Maybe, somewhen.
Dress

The night gown – or so. Undortunately I have no photos of the finished bottom hem. As I haven’t considered the visibility of the shins, I had to shorten the front afterwards(of course with a nice round flow). Also you don’t really see how wonderfully I messed up the left side with acrylics, acrylic ink, sandpaper and different sorts of cutting tools. All seams on the left are purposely not done as I would have needed to tear them off anyway. Only on the shoulder the strengthening was necessary so the dress won’t slide off and you can’t see that under the pauldron.
Choker

At least on the choker you get a slight impression of the aging. After sewing on the beads I “mutiliated” a little more. All beads are additionally painted in the colour of the armour to match it. The light blue glow in the dark and the slightly darker ones(let’s call them “skewers” as well) in black light.
Apron

On the pattern of the apron you can still see the original design, but below there’s already the actual details sewn on. It wasn’t the first time I’ve sewn cords onto fabric, but – the second time, and this time single strings. I must admit, it wasn’t that hard. Also the bias tape was fun. Maybe I eventually become a seamstress. :)

You don’t really see it but the 2 pictures top left
show how I covered the right side with plastic sacks, pins and tape. To make the line even more precise, I strengthened the edge in the middle with more tape. Then I got down the nitty-gritty.
Coarse-grained sandpaper, acrylic ink and acrylics used with various techniques did a great job. Last I sewed on the beads and matched them to the armour.
What I had forgotten at that point was to sew on the three push buttons that hold the apron to the inside of the chest armour. >.<
Shoes

If you spot nice shoes in sale, – a woman – can’t
resist. Though I played with the thought of buying another pair as I didn’t want to ruin them, but once you’re into that kind of thing, you go all the way to the boss battle. I painted on the
same details with iridescent acrylic ink as on the armour edges. (Note: I wanted to do that on dress and choker as well but the fabric would have sought it all in and it would have dissolved.)
The rest was done by the usual three suspects: coarse-grained sandpaper, acrylic ink, the “dirt-mix”-acrylics.
Unfortunately I don’t have photos of the stockings here(you may see a little of them on the picture of the dress), but I took old cotton tights and cut off the legs(I last fitted into those 15
years ago), hemmed the top of them and fixed them with suspender straps to an old(may sound weird but I wouldn’t have worn that anymore otherwise) panty. Of course the left stocking has been –
beautified. Don’t forget the push buttons to keep the shins in place!
Ears and scars

Last is the ears. For them I had a friend(a long
time ago) cast my ears in alginate. These molds were grouted with a robust plaster-casting-slip and cleaned. With modelling clay I scuplted the ears in fitting size. To spare time and frustration
and since the two materials bind well, I used FimoAirLight again for the details. The actual ears are made of 5-6 layers of painted on liquid latex that I dyed with little amount of acrylics.
Careful here: latex does bilge a bit when drying which means skin tones don’t require yellow, only red and white(+black for more southern skin tones) and just little amount(!) of that. To skip
having to wash the brush with latex remover, I have a brush explicitly for latex. If there is too much material on it, I simply cut it off with the same small nail scissors I use for cutting off
the excess latex on finished prosthetics.
There is a more professional, exact method to make ears and scars and I know much about it, but it is too time and latex consuming for me(which also means more weight of the finished product) as
well as needs more of other casting-slips. However I might cast those sculpts in silicone as well(once I have more money) and make permanent models.
Since latex can be covered with general makeup products, which though can darken it with time or improper use, I may end up needing a new pair of ears for each event. On top, as you need to be
very careful when rolling them off the sculpt, which is harder with increasing size, it can be really frustrating if something cracks, not to mention if it is the entire ear as the base is not
absorbtive and does not create a lasting connection
Prosthetics are attached to the body with adhesives such as Spirit Gum or Mastic(a natural resin) that can be removed easily with a special isopropyl alcohol solution, yet can stand a lot of
tension. If you treat your skin properly after use, even sensitive skin(like mine) doesn’t bother. However I do not take any responsibility, nor for wearing contact lenses and the complications
following improper treatment. Thank you. Better known as BEFORE proceeding, PLEASE consult your oculist, dermatologist or common sense.
Ocarina of Time
Making Of Video
~~~~~~~~~~~~~~~~~o~0~O~0~o~~~~~~~~~~~~~~~~~
Write a comment