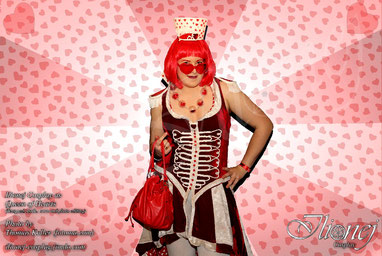
Alice in Wonderland - Queen of Hearts
This costume's was more or less the "Workshop" among my costumes(greetings from Lady Gaga or so). I had a number of spacy ideas which I wanted to implement. However, I don't want to put any sketch online since everything went diffrent as expected. So to say Cosplay-Minecraft - er yes. ^_^
Costume Info
Because suddenly I was given the opportunity to attend this year's (2015) Tuntenball(Queer Ball) in Graz. The motto was Circus - Welcome to the Family, which of course hit me right in the heart. I wanted to make a dress reminiscent of a circus tent, in red and cream white velvet. And my wicked mind told me to not be a fool and rather get done with one of the most troubling costumes in terms of design.
So, with still no real idea in mind, I launched myself into it, three weeks before the ball. Of course. How could I do anything but ruin my body with huge lack of sleep and several injuries(scratches from needles that even became scars and black - er - red and white lungs -.-;) because I found it funny to draw my own patterns, work with polymer clay for the first time, use cheap velvet, nearly ruin a wig I didn't use in the end or sew on yards and yards of cords. Oh, and next to it I sew another dress in the first two of those weeks...
But in the end I had fun at the ball, and I'm not only quite fond of how the dress turned out, but now I have a lot of materials I bought in vain(including hoola hoops and roses wtf).
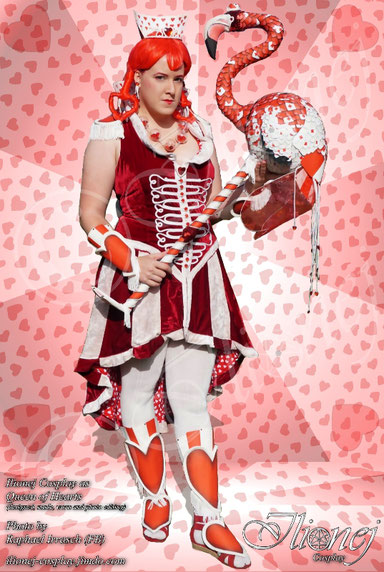
And because of awesomeness: the backs of the white cards, the brooch, the button on the bow, the rims of the armour, the white paint on the flamingo and the crown glow in the dark, plus the eyes of the flamingo can be switched on to glow as well. ^^
Costume Status
~ FINISHED ~
Time exposure:
2 weeks in February 2015(dress, pauldrons, crown, collar), the rest from June to October 2015 - necklace was done earlier
-
Wig: 12h15, but I will use my beloved "Red Bobby" if I need more comfort. XD
- Dress: 130h15
- Crown: 41h35
- Pauldrons: 30h10
- Other armour: 65h20
-
Bow: 7h15
- Card collar: 7h
- Necklace: 3h
- Brooch: 30min
- Ear studs: 27min
- Flamingo Staff: 196h45
Total: 494h32
Costs:
- Fabrics and braids: 80.30€
- Buttons: 10€
- Wig: 21.99€
- Glass heart for necklace: 1.50€
- Red acrylic crystals: 1€
- Acrylic spheres: 5.22€
- Deco hearts: 3.44€
- Acrylic hearts(big): 2€
- Acrylic hearts(small): 1.18€
- Foam shooter(flamingo neck): 3.50€
- Party glasses: 2.99€
- White leggings(for summer cons): 4.95€
- Ear studs bases: 1.11€
- Drapery table cloth: 4.59€
excess material: €24.02(due to plan changes)
Total: 143.77€ (expandable to 167.79 ;) )
26th Queer Ball, February 21st 2015, Congress, Graz(Austria)
AkiCon 2015, October 25th, Seifenfabrik, Graz(Austria)
ViennaComicCon 2016, November 20th, Messe, Vienna(Austria)
Nippon Nation 2019, July 21st, MQ, Vienna (Austria)
AkiCon 2019, October 23rd, Seifenfabrik, Graz(Austria)
Photogallery: Queen of Hearts - Progress
Crown & Wig

I used loads of twisted florist's wire as a base. Not the most stable solution, but if you don't bend your finished piece of drop it from like 5ft, it's okay. Next time I will coat it with hot glue first or use thicker wire before I cover it with the same clay as used for the armour parts, or the brooch and button on the dress..
The playing cards are painted on the back with acrylics. The red is a mix of crimson and iridescent red, the white a mix of white, gold and phosphorescent white.
The little hearts are simply glued on after I shaped the cards by merely gluing them together with hot glue. That stuff can shape pretty much everything! XD As mentioned above, the crown itself
glows in the dark as well.
Last cover your stuff with a satin gloss acrylic varnish. VERY LAST!!!
The colar is held in place with two push buttons to the dress' colar.
Those crystal hearts weren't made by me, btw. 20 for 1€ can't be beaten. Unless you want a very coustom shape, you can always use cheap bits. ;) They'll still look pretty and cosplaying
shouldn't be about showing off, if you're not a millionaire.

There, I said it. I work with "cheap" carnival wigs. The original "Bobby" was great, yes; really thick. But you won't always hit the jackpot. This wig was actually intended for an other Cosplay, but was too flashing in the end. And since I just didn't want to wear it loose either(then I could have worn the Bobby, couldn't I?), I had to deal with a black!!! netting. What kind of morron uses black netting on a neon red wig!
So I simply fitted said problem child with acrylics. Would have nearly been my doom as I didn't recon with how it'd lose it's flexibility -
and I have to fit tons of my hair underneath. But it worked. Strands woven and the netting was barely visible. In addition - uh - see next picture.
The usual florist's wire was the base for the pigtails. I fixed it all with the same waterthinnable acrylic varnish with which I seal all my other acrylics(no spray paint!! ;) ). A few more
details glued on and done..almost.

As the netting was still not fully concealed, I had the grand idea of making a veil - from a piece of deco table cloth. The second half went
onto the flamingo. This way the veil had a design vise reason too. Veil and braids are simply glued to the bottom of the crowm and the panel is framed with my white acrylic mix. TripplePlus:
doesn't fray, is visible at day, glows in the dark. :)
Regarding the fixations of the crown, I had serious issues with the initial bobby pins. The rings on the crown were too thick and gaped the pins. It did stay on while dancing even, but it just
couldn't be the ultimate solution. This now consists of little yarn hoops sealed with hot glue and tiny push buttons sewn on. 5 in whole.
Armour

Here you can see my new method. Rather than using masses of papier-mâché and gesso like on the Blackreach Wizard Guard, I decided for a simpler version. It's pretty much what you'd do with Worbla, but with cheap cardboard, greyboard and hot glue
instead.
You can shape your parts(and even make later alterations with a heat gun or blow drier) and they're very sturdy too.
This time I also decided for rubber straps and clasps instead of Velcro tape and they're glued between the middle and front layer. No falling apart anymore. :)
The edges are roughly sealed with hot glue. No need for absolutely precise work on them.

As before, I can store them easily. Later I'll put air cushion foil between so they don't unnecessarily rub against each other.
The edges are sculpted with "Fimo Air Light", an air drying featherweight polymer clay. It had to be air drying because the pieces would lose their shape if I had to bake them. It's dry within
24h, more or less, depending on the thickness.
You can also file and sand that stuff easily and if you accidentally remove too much or find holes/cracks, just fill that stuff up and wait a few hours for it to dry.
Before priming the pieces with waterproof wood glue, I attach things like braiding and additional fixing tools(like the push buttons, the only way the pauldrons are held to the dress - and
how they stay in place! :D)
Now they're ready to be painted.

Playing cards! Yay! :D No. Literally SPACKLING all of them with 5-6 layers of acrylics isn't fun. (even more fun it was on the flamingo, but go further below for
that)
The mixes are the same. Red and metallic orange, two darker shades achieved by mixing black in. No water, only little paint for the shading. The edges with the glow-in-the-dark-white-mix.
Advantage of secret dealings in darkness: I could check how precise I worked.
Last but not least, the unnecessary gradient on the inside as well as Ls and Rs almost calligraphically painted in for "confusion moments", deco hearts glued on, silky gloss acrylic varnish
daubed on. Who needs those well known thermoplastics. My thermoplastic is called hot glue. ^^
Dress

I made all the patters myself, drafted off a piece of clothing I already have. Sewing the skirt was as much fun as it was a pain in the AVOCADO. Love the lining. It's 100% cotton and feels so good on the skin.

Uuuuuh the front. Yeah. First time I did something like that and of course I was frigging tired and under a lot of time preasure. >-< How not. It's always
like that.
The bow is made of two heart-shaped cushions, a long velvet sash and a button(that and the brooch are made like the front of
the crown). It's attached to the dress with 4 push buttons.
Flamingo Staff
LET'S FLAMINGLE!!! :DDD
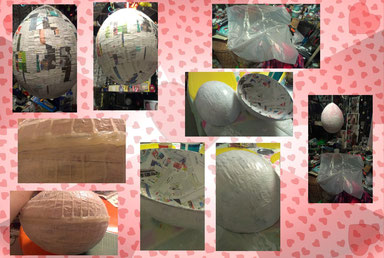
Every Queen of Hearts needs a flamingo. Yes, elementary scool crafting classes can be so useful when youre grown up!
It's really big and I had to strengthen it with hot glue. But that doesn't matter because this is just the base. Let me surprise you... ^^

Some insight...literally.


And here's everything in pictures, and finally a first test regarding the total size! :D But that's unimportant, as long as I can put on my head.

It is common news that velcro tape sticks to ears. Wait - what was that? Meh. The already introduced
cardboard-sandwich-technique also applies on the wings. Yet the tail is only two layers of greyboard merged with wood glue and secured with hot glue.
"The Football" is not only held together by one clasp on the inside and one under the tail, but foremost by two velcro tapes, which thanks to my sewing skills hold the wings to the body as
well.
Little advice, if you know in advance that you will later glue on playing card shards, you may save 1/3 of the wood glue/acrylics layers. >.<;

Now the head is taking shape. Cardboard, hot glue, plain-Jane-circuit, favourite Fimo. Ah yes! New colours! Acrylics are now available in pink, gold-black and grey! :D If it wasn't for the hundreds of littering hearts that killed the buzz..

Playing-cards-cutting-101. If you thought I was joking, the "spackling" wasn't the end of it. White gained silver
shading(tips spared), red the usual suspects and pink tips.

Tadaaa!! The (almost) full scale of the catastrophe. Leg(s) coming immediately. But first, let's make some tape-supported poses. The switch in the crown works and now the veil on my crown has become a bit more comprehensible(please remember above).

Binder twine can perfectly be repurposed for borderlines. Glued on with a universal adhesive, it can easily be pulled off the
acrylics(white primer here). Only a few details fixed, actual cords glued on. Hiding the actually very exact connection hurt me, but I had to. With tons of littering hearts. Now the ones on the
head don't feel that lonely anymore.
If you look closely, you may be able to see that the little black claws are also heart-shaped. =^.^=
[What on earth has happened to me! I hate hearts, to be honest!]

And so that you don't only just read about it all the time, here a quick size comparison as well as the wonderful
glow-in-the-dark-effects, including LEDs. DONE. *sigh*
Necklace
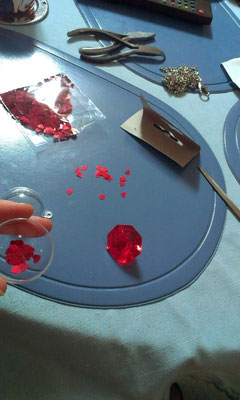

Ball diameter: 30mm
Materials: deco balls, acrylic gems, strewing hearts, 1 glass heart, silvered iron chain, magnetic clasp
~~~~~~~~~~~~~~~~~o~0~O~0~o~~~~~~~~~~~~~~~~~
Write a comment